Installing brake pads bike is a crucial part of maintaining your bicycle’s performance and safety. Ensuring your brake pads are in prime condition not only improves your ride but also keeps you safe during your trips. Here’s a quick guide for those eager to get started:
- Remove the wheel to access brake pads.
- Check for wear and tear on the existing pads.
- Gently push pistons back before removing old pads.
- Install new pads carefully, ensuring proper alignment.
- Clean the caliper to prevent contamination.
Maintaining your bike’s brake pads is not just about performance—it’s also a matter of safety. As a passionate rider who values sustainability and crisp, city commutes, regularly checking and replacing your brake pads becomes second nature. Over time, worn-out or contaminated brake pads can lead to reduced braking power and even damage your rotors.
Keeping your bike in top shape with proper maintenance not only ensures a smooth ride but also supports your commitment to eco-friendly transportation. Regular checks and timely replacements of your brake pads contribute significantly to safe rides and the longevity of your bike’s braking system.

Installing brake pads bike basics:
Understanding Brake Pad Types
When it comes to installing brake pads bike, understanding the different types of brake pads is essential. The two main categories are rim brake pads and disc brake pads. Each type has its own systems and materials, which affect performance and suitability for various riding conditions.
Rim Brake Pads
Rim brakes are common on road bikes and come with two main pad systems: threaded stud and smooth stud.
-
Threaded Stud Pads: These are attached to the caliper arm with a stud that has threads. You can identify them by the presence of two convex and two concave spacers. They’re a popular choice for road bikes due to their adjustability and ease of installation.
-
Smooth Stud Pads: Found mostly on cantilever brakes, these pads have a post without threads. The caliper arm pinches the post to hold the pad in place. They are typically used in cyclocross bikes.
Both systems can be either a one-piece unit or a cartridge style, where the pad material slides in and out of a holder. Cartridge styles allow for easier pad replacement without changing the entire unit.
Disc Brake Pads
Disc brakes use pads that press against a rotor to stop the bike. These come in two main materials: resin/organic and metallic/sintered.
-
Resin/Organic Pads: Made from materials like rubber and Kevlar, these pads offer quieter braking and better modulation. However, they wear faster, especially in wet conditions, and can lose power during prolonged braking.
-
Metallic/Sintered Pads: These are made from metal particles bound together. They perform well under sustained braking and in muddy conditions. However, they tend to be noisier and can wear down rotors more quickly.
Choosing the right material depends on your riding style and conditions. For instance, if you often ride in wet or muddy environments, metallic pads might be a better choice. On the other hand, if you prefer quieter rides with less aggressive braking, resin pads might suit you better.
Understanding these differences will help you choose the best brake pads for your bike, ensuring a safe and efficient ride. Next, we’ll dive into the step-by-step process of installing brake pads on your bike.
Step-by-Step Guide to Installing Brake Pads on Your Bike
Removing the Old Brake Pads
Before you start installing brake pads on your bike, you need to remove the old ones. Here’s how to do it:
Tools Needed
- Needle-nose pliers
- Flat head screwdriver or hex wrench (usually 3mm)
- Clean rag and rubbing alcohol
Preparation
-
Set Up Your Workspace: Ideally, use a bike stand to lift your bike off the ground. This makes it easier to work on.
-
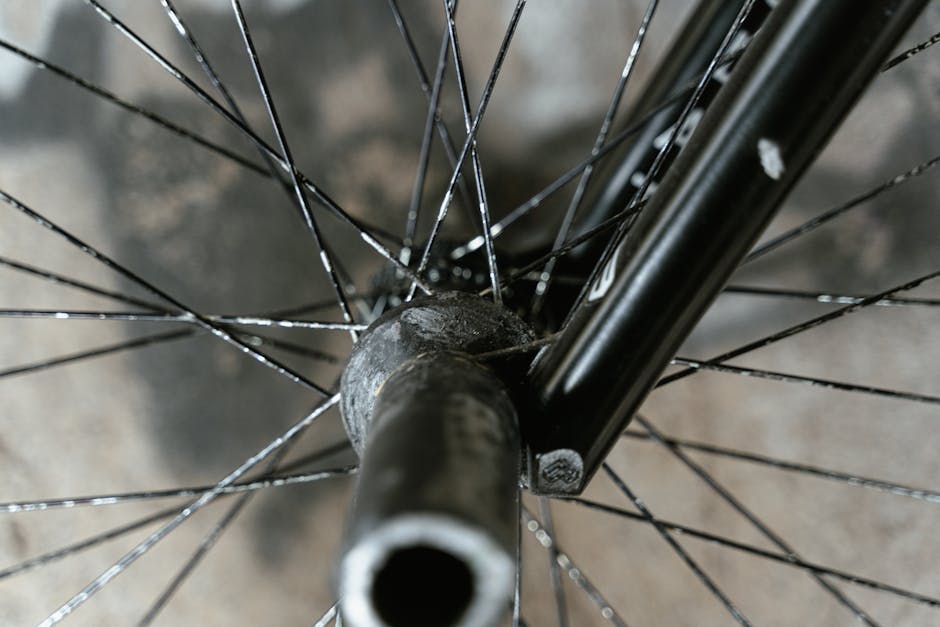
Remove the Wheel: Open the brake calipers using the quick-release lever. Then, take off the wheel. This gives you clear access to the brake pads.
Wheel Removal
For disc brakes, removing the wheel is straightforward. Ensure the bike is stable, then release the axle and slide the wheel out. For rim brakes, open the caliper to free the wheel.
Pad Retention Screw
-
Rim Brakes: Look for a small set screw on the side of the brake shoe. Use a hex wrench to back it out slightly so you can wiggle the pad free. Older systems might have a pin instead.
-
Disc Brakes: Remove the horizontal screw or bolt. If there’s a fixing pin or circlip, use pliers to carefully remove it.
Inspection
With the old pads removed, inspect them for wear. Look for deep grooves or uneven surfaces. This can indicate issues with alignment or foreign materials.
Now, inspect the brake track on the rim or rotor. Clean it with a rag and rubbing alcohol to remove debris and oils.
Installing New Brake Pads
Once the old pads are out, it’s time to install the new ones. Here’s how:
Pad Alignment
-
Identify the Pads: New pads are often marked with ‘L’ (left) or ‘R’ (right). Make sure you have the correct pad for each side.
-
Slide the Pads In: For cartridge-style rim brakes, slide the new pad into the shoe. For disc brakes, slide the pads into the caliper, ensuring they seat properly.
Retention Screw
-
Rim Brakes: Once the pad is in place, tighten the set screw or replace the pin to secure the pad.
-
Disc Brakes: Replace the horizontal screw or bolt. If applicable, reinsert the fixing pin or circlip.
Caliper Adjustment
-
Reattach the Wheel: Once the pads are secure, put the wheel back on and close the caliper.
-
Check Alignment: Squeeze the brake lever to check pad alignment. The pads should contact the rim or rotor evenly.
-
Adjust if Necessary: Use the barrel adjuster to fine-tune the brake pads’ position. Ensure they make firm contact without rubbing against the tire or rotor.

By following these steps, you’ll have your brake pads installed correctly, ensuring safe and reliable performance on your bike. Next, we’ll explore tips for maintaining optimal brake performance.
Tips for Optimal Brake Performance
Bedding in New Brake Pads
When it comes to installing brake pads bike, ensuring optimal performance doesn’t just stop at installation. Bedding in new brake pads is crucial for smooth, powerful, and noise-free braking. This process involves transferring a thin layer of pad material onto the rotor, creating a uniform surface for the pads to grip.
Rotor Preparation
Before you begin the bedding-in process, make sure your rotors are clean. Use a clean rag and rubbing alcohol to wipe away any grease or dust. This ensures there are no contaminants that could affect the new pad material bonding with the rotor.
Braking Technique
To bed in your new brake pads, follow this technique:
-
Find a Safe, Flat Area: A quiet street or parking lot is ideal.
-
Pedal Up to Speed: Start at about 10 mph.
-
Apply Brakes Gradually: Use one brake lever at a time. Apply the brakes with increasing force, but do not come to a complete stop. Repeat this 5 to 10 times for both the front and rear brakes.
-
Increase Speed: Now, pedal up to 15-20 mph and repeat the braking process.
With each repetition, you should feel the brakes gaining more power and responsiveness.
Brake Noise Reduction
If your brakes are noisy, it could be due to improper bedding or misalignment. Ensure the pads are aligned correctly and that the bedding process is complete. Sometimes, a slight toe-in adjustment (where the front of the pad contacts the rim or rotor slightly before the rear) can help reduce noise.
Pad Wear Indicators
Regularly check your brake pads for wear. Most brake pads have wear indicators—small grooves or lines. If these are no longer visible, it’s time to replace the pads. Keeping an eye on these indicators helps maintain optimal braking performance and safety.
Rotor Maintenance
Rotors can become warped or contaminated over time. Regularly inspect them for any signs of damage or wear. Clean them with rubbing alcohol to remove any oils or debris that could affect braking efficiency.

By following these tips, you’ll ensure your bike’s braking system remains effective and reliable. Next, we’ll address some frequently asked questions about brake pad installation.
Frequently Asked Questions about Installing Brake Pads on a Bike
Is there a wrong way to install brake pads?
Absolutely, installing brake pads incorrectly can lead to performance issues and even safety hazards. One common mistake is improper orientation. Many brake pads have specific left and right sides or a directional arrow indicating the correct installation direction. Installing them backward can reduce braking power and cause uneven wear.
Another mistake is failing to align the pads correctly with the rotor or rim. Misalignment can cause squeaking or rubbing noises and decrease braking efficiency. Always ensure the pads sit flat against the braking surface and adjust if necessary.
How often should I replace my bike brake pads?
The frequency of brake pad replacement depends on factors like riding conditions, terrain, and braking habits. However, a good rule of thumb is to inspect your brake pads regularly. Look for wear indicators—small grooves or lines on the pad surface. If these grooves are no longer visible, it’s time to replace the pads.
For regular riders, checking the pads every few months is advisable. If you frequently ride in wet or muddy conditions, inspect them more often as these conditions can accelerate wear.
What tools do I need for brake pad installation?
Installing brake pads on a bike is a straightforward task that requires only a few basic tools:
-
Allen/Hex Wrench: Typically, a 4mm wrench is needed to remove and install the pads. Some systems may require a 2.5mm wrench for the pad retention mechanism.
-
Needle-nose Pliers: Useful for removing fiddly clips or pins.
-
New Brake Pads: Ensure you have the correct type for your bike—rim or disc, and the right material for your rim type (alloy, carbon, ceramic).
-
Work Stand (Optional): While not essential, a work stand makes the process easier by holding the bike steady.
For more complex brake systems, you might need specialized tools. However, for most rim and disc brake systems, the basic tools listed above will suffice.
By understanding these common questions and mistakes, you can confidently tackle brake pad installation and ensure your bike stops smoothly and safely.
Conclusion
At Doot Scoot, we believe in empowering our community with the knowledge to keep their eBikes in top shape. Understanding installing brake pads on your bike not only ensures your safety but also improves your riding experience. Our commitment to eco-friendly transportation is rooted in making sustainable urban mobility accessible and enjoyable for everyone.
Brake maintenance is a small but crucial part of this journey. By ensuring your brakes are in optimal condition, you’re contributing to a cleaner, greener urban environment. Proper brake pad installation means fewer replacements, less waste, and more efficient rides. Whether you’re cruising through the city or tackling challenging trails, knowing your brakes are reliable gives you peace of mind.
But it’s not just about the mechanics. At Doot Scoot, we aim to build a community of eBike enthusiasts who share a passion for sustainable living. We encourage you to engage with us, share your experiences, and learn from fellow riders. Together, we can make urban transport not just a necessity, but a joy.
For more insights on maintaining your eBike and to explore our community initiatives, check out our Doot Scoot page. Let’s ride towards a sustainable future, one pedal at a time.


