Importance of eBike Chain Maintenance
eBike chain replacement is a crucial task that should not be overlooked by any eBike owner. A well-maintained chain ensures smooth rides, prevents premature wear and tear on other components, and ultimately saves you money. Ignoring chain maintenance can lead to issues like chain slipping and more severe damage to your cassette and crankset.
Here’s what you need to know at a glance:
- Signs your chain needs replacing: Slipping, skipping gears, unusual wear on cassette or chainring teeth.
- Tools required: Chain tool, master link pliers, new eBike chain.
- Steps involved: Removing the old chain, sizing the new chain, installing the new chain, and testing it.
eBikes, due to their motor-assisted power, put additional stress on chains compared to regular bicycles. Therefore, they typically require sturdier, eBike-specific chains designed to handle the increased torque.

Quick eBike chain replacement definitions:
Tools and Materials Needed
Replacing your eBike chain might seem daunting, but with the right tools and materials, it’s a straightforward process. Here’s what you’ll need:
Chain Tool
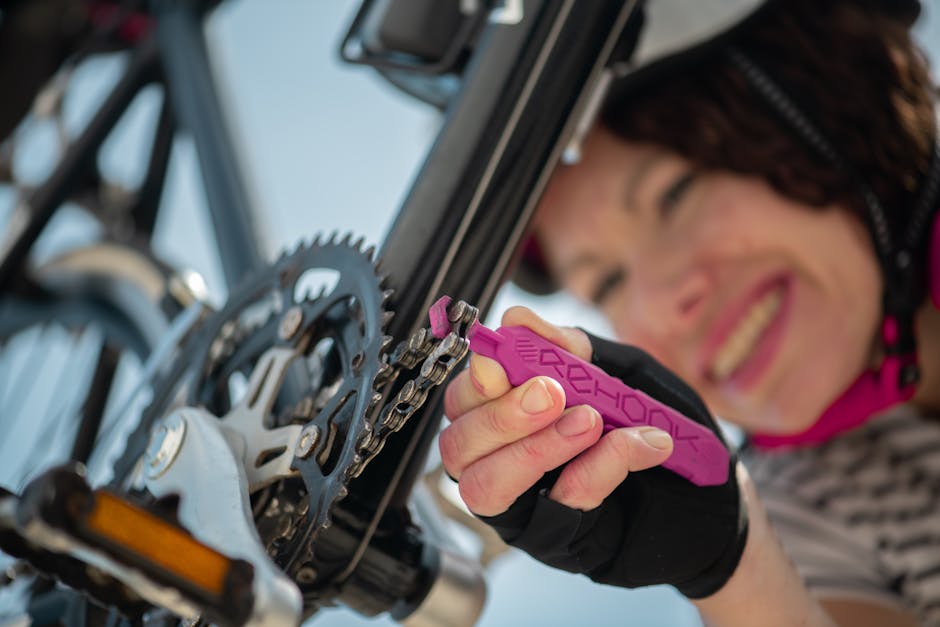
A chain tool is essential for both removing and installing your chain. This tool helps push out the pins that hold the chain links together, allowing you to break the chain at any point. It’s also used to reassemble the chain by pushing the pins back in place.
Master Link Pliers
If your chain uses a master link (also known as a quick link), you’ll need master link pliers. These pliers make it easy to open and close the master link, which is crucial for quick and hassle-free chain removal and installation.
New eBike Chain
You’ll need a new eBike chain that’s compatible with your drivetrain. eBike-specific chains, like the KMC e9 Sport 9-Speed E-Bike Chain, are designed to handle the higher torque and stress that eBikes generate. These chains are generally more durable and robust compared to standard bicycle chains.
Measuring Tape
A measuring tape is useful for ensuring your new chain is the correct length. Proper chain length is crucial for optimal performance and to prevent excessive wear on your drivetrain components.
Why Choose an eBike-Specific Chain?
eBike-specific chains, such as the KMC e9 Sport 9-Speed E-Bike Chain, are engineered to handle the extra tension and torque that eBikes produce. These chains are typically rated higher in terms of strength and durability, which means they last longer and perform better under the unique demands of an eBike.

To sum up, gathering the right tools and materials is the first step in ensuring a smooth and effective eBike chain replacement. Once you have everything ready, you’ll be well-equipped to tackle the task ahead.
Next, we’ll dive into the step-by-step process of removing the old chain, so stay tuned!
How to Remove the Old Chain
Removing the old chain from your eBike is the first step in the chain replacement process. The method you use will depend on whether your chain has a quick link (also known as a master link) or not.
Removing a Chain with a Quick Link/Master Link
If your chain has a quick link, the removal process is straightforward.
-
Locate the Quick Link: Find the quick link on your chain. It’s usually a different color or design compared to other links.
-
Use Master Link Pliers: Open your master link pliers and place them on either side of the quick link.
-
Squeeze the Pliers: Squeeze the pliers together to release the quick link. The link should come apart easily.
-
Remove the Chain: Once the quick link is disengaged, simply remove the chain from the bike.
Removing a Chain without a Quick Link/Master Link
If your chain doesn’t have a quick link, you’ll need to use a chain tool to remove it.
-
Position the Chain Tool: Place the chain tool on any link of the chain. Ensure the chain is properly seated in the tool.
-
Align the Pin: Make sure the chain tool’s pin is aligned to push against one of the chain’s pins.
-
Push the Pin Out: Turn the handle of the chain tool to push the pin out. Do not push the pin all the way out unless you plan to discard the chain entirely.
-
Separate the Chain: Once the pin is mostly out, you can separate the chain by pulling it apart at the broken link.
-
Remove the Chain: With the chain broken, remove it from the bike.
With the old chain removed, you’re ready to move on to sizing and installing the new chain. Next, we’ll cover how to measure and cut your new chain to the correct length for optimal performance.
Sizing the New Chain
Measuring the Chain
Getting the right chain length is crucial for smooth riding. A chain that’s too long can cause shifting issues, while a chain that’s too short can damage your drivetrain.
-
Drape the New Chain: Start by draping the new chain over the largest chainring in the front and the largest cog in the cassette at the back. This is often referred to as the “big-big” method.
-
Avoid the Derailleur: Make sure the chain bypasses the derailleur for now. This helps in measuring the correct length without any tension.
-
Mark the Link: Pull the chain tight and find the point where the chain meets. Add two full links (one inner and one outer link) to this point. This extra length allows for proper derailleur movement.
Cutting the Chain to Size
Once you’ve marked the correct length, it’s time to cut the chain.
-
Prepare the Chain Tool: Place the chain in the chain tool, making sure the pin of the tool is aligned with the pin of the link you need to cut.
-
Push the Pin: Turn the handle of the chain tool to push the pin out. Be careful not to push it all the way out, as you’ll need to reattach the chain later.
-
Remove Excess Chain: Once the pin is out, remove the excess chain. Keep the extra links; they might come in handy later.
-
Double-Check the Length: Before you proceed, drape the cut chain again to ensure the length is correct. It’s better to double-check now than to realize a mistake later.
With the new chain properly sized, you’re ready to install it. In the next section, we’ll guide you through routing the chain through the derailleur and reconnecting it.
Installing the New Chain
Routing the Chain through the Derailleur
Now that you have your new chain cut to the right length, it’s time to route it through the derailleur. Proper routing is crucial for smooth and efficient shifting.
-
Lower Jockey Wheel: Start by threading the chain around the lower jockey wheel. This is the smaller wheel at the bottom of the derailleur cage. Make sure the chain is on the outside of the wheel.
-
Upper Jockey Wheel: Next, guide the chain around the upper jockey wheel. This wheel is located at the top of the derailleur cage. Again, ensure the chain is on the outside of the wheel.
-
Over the Cassette: After routing through the jockey wheels, drape the chain over the cassette. Make sure it sits well in the grooves of the gears.
-
Check the Routing: Double-check the chain routing to ensure it follows the correct path. Incorrect routing can cause poor shifting performance and potential damage to the drivetrain.
Reconnecting the Chain
With the chain properly routed, it’s time to reconnect the ends. The method you use will depend on whether your chain uses a master link/quick link or a standard pin reassembly.
Using a Master Link/Quick Link
-
Attach the Link Ends: Insert the ends of the master link/quick link into the ends of the chain.
-
Connect the Link: Bring the two ends of the quick link together until they click into place.
-
Secure the Link: Use master link pliers to ensure the quick link is securely locked. Place the pliers on either side of the link and squeeze until you hear a click.
Using a Chain Tool for Pin Reassembly
-
Align the Chain Ends: Insert the two ends of the chain together, ensuring the pin is aligned with the hole in the opposing link.
-
Prepare the Chain Tool: Place the chain in the chain tool, making sure the pin of the tool is aligned with the pin in the chain.
-
Push the Pin: Slowly turn the handle of the chain tool to push the pin back into the link. Be careful to align the pin correctly to avoid damaging the chain.
-
Loosen the Link: Once the pin is in place, move the link back and forth to ensure it is not stiff. A stiff link can cause shifting issues and should be loosened before riding.
With the chain reconnected, you’re almost ready to ride. In the next section, we’ll cover how to test and adjust the new chain to ensure everything is working smoothly.
Testing and Adjusting the New Chain
Running Through the Gears
After installing your new chain, it’s crucial to test it by running through all the gears. This ensures that the chain shifts smoothly and indexes correctly.
-
Shift Through All Gears: Start by shifting through all the gears on your bike. This includes both the front chainrings and the rear cassette. Pay attention to how smoothly the chain moves from one gear to the next.
-
Listen for Noise: As you shift, listen for any unusual noises like clicking or grinding. These sounds can indicate that the chain is not properly aligned or that there is too much slack.
-
Check for Smooth Shifting: Ensure that the chain transitions smoothly between gears. If you notice any hesitation or if the chain skips a gear, adjustments are needed.
-
Inspect the Chain Position: Make sure the chain sits well in the grooves of each gear. Misalignment can cause poor shifting performance and wear out your drivetrain components faster.
Adjusting Chain Length
If your chain has too much slack or doesn’t shift into the larger rings in the cassette, you may need to adjust the chain length.
-
Identify Slack: Look for any slack in the chain when it’s on the smallest chainring and the smallest cassette cog. The chain should be taut but not overly tight.
-
Remove Excess Links: If there is too much slack, use your chain tool to remove one or two links. Be cautious not to remove too many links, as this can prevent the chain from reaching the larger gears.
-
Reconnect the Chain: After removing the excess links, reconnect the chain using the master link or chain tool. Ensure the connection is secure and the link is not stiff.
-
Test Again: Run through the gears once more to check for smooth shifting and correct indexing. Make any additional adjustments as needed.
By following these steps, you ensure that your new chain is properly installed and adjusted for optimal performance. Now, your eBike is ready for a smooth and efficient ride!
Frequently Asked Questions about eBike Chain Replacement
Do eBikes need a special chain?
Yes, eBikes often benefit from using a special chain, especially if they have a mid-drive motor. Mid-drive motors put hundreds of watts of power through the chain, causing more wear and tear compared to traditional bikes. A standard bicycle chain might not be strong enough to handle this extra stress.
Using a chain specifically designed for eBikes, like the KMC e9 Sport 9-Speed E-Bike Chain, can offer better durability. These chains are built to withstand the higher torque and power associated with eBikes, making them a worthwhile investment for longer chain life and smoother rides.
How often should you change an eBike chain?
The frequency of eBike chain replacement depends on several factors, such as the type of motor (mid-drive or hub), your riding habits, and maintenance routines.
For example, one user mentioned getting about 2,000 miles out of their chain on a high-power mid-drive eBike with regular cleaning and lubing. Another noted that hub motors, which don’t put power through the chain, can result in chains lasting a year or three, depending on rider effort.
A good rule of thumb is to use a chain stretch tool to measure wear. Replace the chain when it shows 0.5% wear if you have an aluminum cassette or are running 11 or 12 speed. For other setups, replace at 0.75% wear. Regularly checking your chain can help extend the life of your drivetrain components.
Are there eBike specific chains?
Yes, there are eBike-specific chains designed to handle the unique stresses of electric bikes. Brands like KMC offer chains such as the KMC e9 Sport 9-Speed E-Bike Chain. These chains are built to be stronger and more durable, making them suitable for the higher torque and power output of eBikes, especially those with mid-drive motors.
Using an eBike-specific chain can improve your bike’s performance and prolong the life of your drivetrain components, making it a smart choice for any eBike owner.
By understanding these aspects of eBike chain replacement, you can ensure your bike remains in top condition for a smooth and efficient ride.
Conclusion
Regular maintenance is key to keeping your eBike in top shape. eBike chain replacement is one of the most critical aspects of this maintenance. A worn chain can lead to poor performance and even damage other components like the cassette and crankset. Replacing the chain in a timely manner will save you money and extend the life of your drivetrain.
Why is regular maintenance so important?
- Cost Efficiency: Chains are cheaper to replace than the entire drivetrain.
- Performance: A new chain ensures smooth gear shifting and efficient power transfer.
- Durability: Regular checks and replacements prevent premature wear of other parts.
At Doot Scoot, we emphasize the importance of regular eBike maintenance. We offer a variety of tools and guides to help you keep your eBike in perfect condition. For more information and to find the tools you need, visit our tools page.
By following the steps outlined in our guide and using the right tools, you can ensure that your eBike remains reliable and enjoyable to ride. Regular maintenance not only improves the performance of your eBike but also contributes to a more sustainable and eco-friendly mode of transportation.
Keep riding smoothly and safely with Doot Scoot’s expert advice and resources!
