Why eBike Brake Adjustment is Important
When your eBike brakes work correctly, it means a safe, smooth ride every time. Proper eBike brake adjustment ensures your braking system is effective, reducing the risk of accidents. Misaligned brakes, on the other hand, can make stopping difficult and dangerous.
Whether you’re dealing with a rubbing noise or your eBike isn’t stopping as quickly as it should, it’s important to get your brakes adjusted. Here’s a quick guide to help keep your eBike in top shape:
- Safety First: Always ensure the eBike is securely on a stand before starting.
- Tools Needed: Gather a 5mm Allen/Hex Key, a torque wrench, and a flashlight.
- Checklist: Loosen the brake caliper bolts, align the rotor, and re-tighten the bolts while checking for proper alignment.
Following these simple steps can make your ride safer and extend the life of your brake components.

EBike brake adjustment glossary:
Tools Needed for eBike Brake Adjustment
Before diving into the eBike brake adjustment process, it’s crucial to have the right tools on hand. These tools will make the job easier and ensure your brakes are adjusted correctly.
5mm Allen/Hex Key
A 5mm Allen or Hex Key is essential for loosening and tightening the brake caliper bolts. This tool allows you to make precise adjustments to the caliper positioning.
Torque Wrench
A torque wrench ensures that bolts are tightened to the manufacturer’s recommended specs. Over-tightening or under-tightening can lead to brake failure. Always refer to your eBike’s specific torque specs for accurate adjustments.
Bike Stand
A bike stand holds your eBike securely in place, allowing you to work on it safely. It also makes it easier to spin the wheels and check brake alignment.
Flashlight
A flashlight helps you see the tiny gaps between the brake pads and the rotor. Proper lighting is crucial for making fine adjustments and ensuring the rotor spins freely without rubbing.
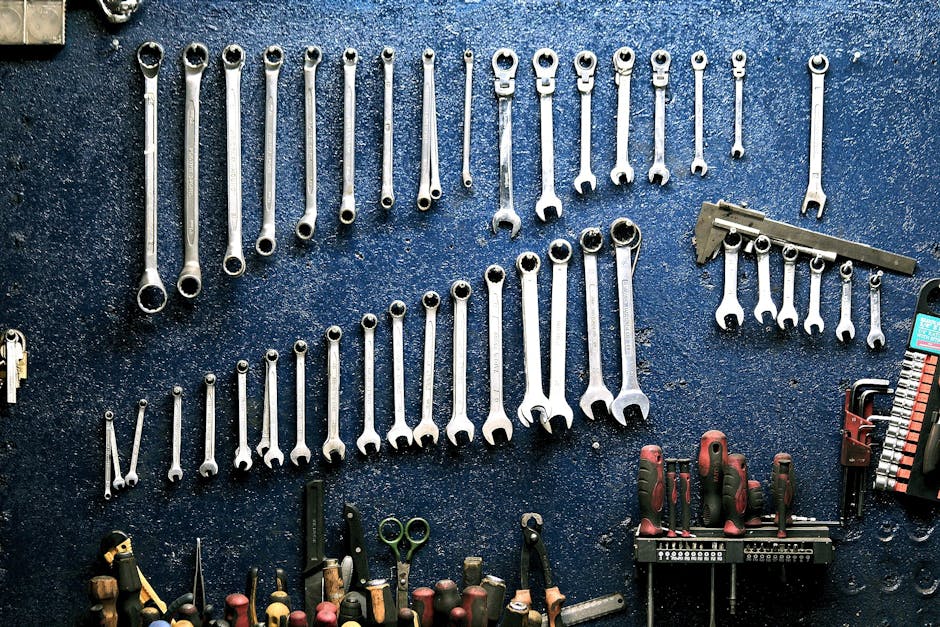
Having these tools ready will make your eBike brake adjustment process smoother and more efficient. Now, let’s move on to the step-by-step guide.
Next up, we’ll dive into the actual process of adjusting your eBike brakes, starting with loosening the brake caliper.
Step-by-Step Guide to Adjusting eBike Brakes
Loosening the Brake Caliper
To start your eBike brake adjustment, you’ll need to loosen the brake caliper. This allows you to reposition it for optimal alignment.
- Locate the Brake Caliper: Find the two bolts that attach the brake caliper to the frame.
- Use a 5mm Allen/Hex Key: Insert the key into the bolts.
- Loosen the Bolts: Turn the key counterclockwise. Do not remove the bolts completely; just loosen them enough so the caliper can move around.
Centering the Brake Rotor
Once the caliper is loose, the next step is to center the rotor between the brake pads.
- Spin the Wheel: With the caliper loose, give the wheel a good spin.
- Grab the Brake Lever: While the wheel is spinning, squeeze the brake lever to lock the wheel in place. Do this a couple of times.
- Hold the Brake Lever: On the final spin, keep the brake lever squeezed.
- Tighten the Bolts: While holding the brake lever, use the 5mm Allen/Hex Key to tighten the bolts. This helps center the rotor between the pads.
- Torque Rating: Finish tightening the bolts to a torque rating of 6-8 nm using a torque wrench.
Fine-Tuning the Brake Caliper
Sometimes, the rotor might still rub slightly after the initial adjustment. Here’s how to fine-tune it:
- Use a Flashlight: Shine a light into the caliper to see the gaps between the rotor and the brake pads.
- Check Alignment: Look for any side where the rotor is touching the brake pad.
- Adjust the Bolts: Loosen the top bolt and gently push the caliper in the opposite direction of the rubbing. Tighten the top bolt once the rotor is centered.
- Repeat for the Lower Bolt: Do the same for the lower bolt.
It may take a few attempts to get it just right. Patience is key here. Keep checking the alignment and making small adjustments until the rotor spins freely without any rubbing.
With these steps, you should have your eBike brakes properly adjusted. Next, we’ll address some common issues and troubleshooting tips.
Common Issues and Troubleshooting
Even after following the steps to adjust your eBike brakes, you might encounter some common issues. Here’s how to diagnose and fix them.
Diagnosing Rubbing Noises
Rubbing noises can be a sign that your brake rotor isn’t perfectly aligned. These noises can range from a loud scrap or dragging sound to a small, periodic “ting” noise. Here’s how to diagnose them:
- Spin the Wheel: Listen closely as the wheel spins.
- Identify the Noise: Determine whether the noise is constant or periodic.
- Check the Rotor: Look at the rotor to see if it’s wobbling or if it appears to be touching the brake pads at any point.
Truing the Rotor
If your rotor is wobbling or you hear a rubbing noise at a specific spot, the rotor may need to be trued. Here’s how:
- Locate the High Side: Spin the wheel and identify the spot where the rotor is closest to the brake pad.
- Use a Rubber Mallet: Gently tap the high side of the rotor with a rubber mallet to straighten it.
- Check Your Progress: Spin the wheel again to see if the rotor is now trued. Repeat the process if necessary.
Adjusting for Misalignment
If your brake caliper is misaligned, it can cause the rotor to rub against the brake pads. Follow these steps to correct it:
- Check Alignment: Use a flashlight to look into the caliper and see if the rotor is centered between the pads.
- Adjust the Caliper: Loosen the bolts slightly and push the caliper in the direction needed to center the rotor.
- Use Spacers and Washers: If the caliper cannot be adjusted enough, use spacers or washers to help align it properly.
- Tighten the Bolts: Once the rotor is centered, tighten the bolts securely.
By diagnosing and addressing these common issues, you can ensure your eBike’s brakes are functioning properly and safely. Next, we’ll dive into frequently asked questions about eBike brake adjustment.
Frequently Asked Questions about eBike Brake Adjustment
How to Adjust Brakes on eBikes?
Adjusting eBike brakes is a simple process that involves three main steps:
-
Loosen the Bolts: Using a 5mm Allen/Hex Key, slightly loosen the bolts that attach the brake caliper to the frame. This allows the caliper to move freely.
-
Center the Rotor: Spin the wheel and then grab the brake lever to center the rotor between the brake pads. This step ensures the rotor is correctly aligned.
-
Tighten the Bolts: While holding the brake lever, tighten the bolts back down to secure the caliper in place. Make sure to check the torque rating for your specific eBike model to avoid over-tightening.
These steps should help you achieve a well-aligned brake system that operates smoothly and safely.
How to Adjust Electric Brakes?
Adjusting electric brakes, such as those found on trailers, involves a few specific steps:
-
Jack Up the Trailer: First, ensure the trailer is safely lifted off the ground using a jack. This allows you to freely spin the wheels and access the brakes.
-
Remove the Brake Access Cover: Locate and remove the cover to access the brake adjustment mechanism. This might be a small rubber plug on the backing plate.
-
Tighten the Adjustment Wheel: Inside the brake assembly, you’ll find an adjustment wheel. Use a brake adjustment tool or flathead screwdriver to turn the wheel, tightening it until you feel a slight drag when spinning the wheel by hand. This indicates the brakes are properly adjusted.
These steps will ensure your electric brakes are functioning correctly, providing safe and effective stopping power.
How to Adjust Spring Tension on Bike Brakes?
Adjusting the spring tension on bike brakes is crucial for balanced braking performance. Here’s how to do it:
-
Increase Spring Tension: To increase the tension, locate the spring adjustment screws on each brake arm. Turning these screws clockwise will increase the tension, making the brakes more responsive.
-
Decrease Spring Tension: Conversely, turning the screws counterclockwise will decrease the tension. This might be necessary if the brakes are too tight or if the pads are not returning to their original position after braking.
-
Balance the Pads: Ensure both brake pads are evenly spaced from the rim or rotor. Uneven pads can cause poor braking performance and uneven wear. Adjust the screws on each side until the pads are balanced.
Properly adjusted spring tension ensures that your brakes are responsive and balanced, providing optimal stopping power and safety.
By understanding these frequently asked questions and their solutions, you can confidently handle your eBike brake adjustments and ensure a smooth, safe ride.
Conclusion
At Doot Scoot, we believe that maintaining your eBike shouldn’t be a daunting task. With the right tools and guidance, you can easily handle eBike brake adjustments on your own. Our DIY guide aims to empower you to take charge of your bike’s maintenance, ensuring it runs smoothly and safely.
Why Choose Doot Scoot for Your eBike Maintenance Needs?
Safety First: Proper brake adjustment is crucial for your safety. Misaligned brakes can lead to inefficient stopping or even accidents. By following our step-by-step guide, you can ensure your brakes are always in top condition.
DIY Made Easy: We break down complex tasks into simple steps. Our guides are designed for everyone, from beginners to experienced riders. Whether you’re adjusting the caliper or centering the rotor, we’ve got you covered.
Comprehensive Resources: Our eBike repair guide offers detailed instructions on various maintenance tasks. From brake adjustments to drivetrain services, you’ll find everything you need to keep your eBike in perfect shape.
Community Support: Join our community of eBike enthusiasts. Share your experiences, ask questions, and learn from others. We’re here to support you every step of the way.
Regular Maintenance for Longevity
Regular maintenance not only improves your riding experience but also extends the life of your eBike. Simple tasks like brake adjustments can prevent bigger issues down the line, saving you time and money.
By following our DIY guide, you can ensure your eBike remains reliable and safe. A well-maintained eBike is a joy to ride and a step towards sustainable urban mobility.
Ready to get started? Check out our tools and resources to make your eBike maintenance a breeze. Happy riding!

